Using the SaaS server
Installing a Cyclotis database server is absolutely not an easy thing, especially if you are translators, not computer specialists. But don't worry: we anticipated the problem. We created a server, available on the internet, in which you can rent some space for your translations.
First, let's connect to the server, at the Silvestris domain.
Now, go to "My Databases" :
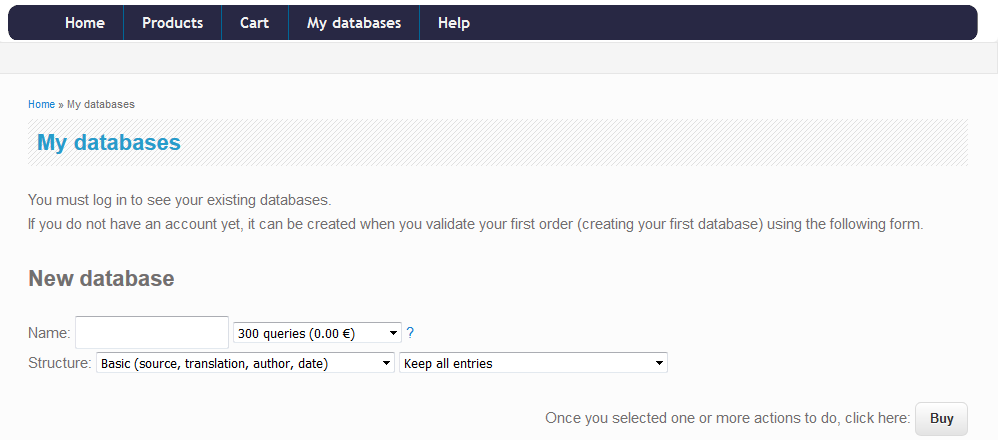
As the website says, you are not yet connected, and that is even more logical since you do not have an account. Don't worry; your account will be created during the validation of creation of your first database.
Type in the corresponding field the name of your project (avoiding spaces). Select a number of queries depending on the size of your project – for a project with 2 translators using OmegaT, 3 times the number of segments in your projects should be a correct estimation. Price depends on the number of queries, but not on the next parameters named "structure": for this sample we will use the highest values for both fields, because they are needed for "project share", which will be discussed later.
After clicking on "Buy", you will see something like this:
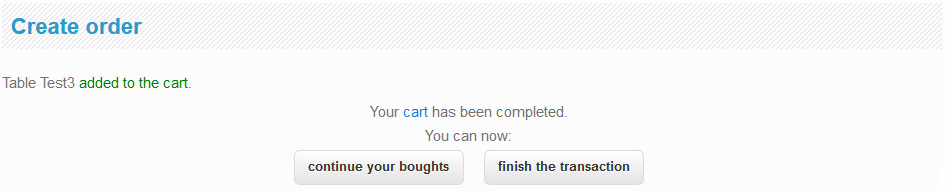
This screen shows you all actions which have been done by the "Buy" button: adding one new memory in the cart.
NEW If you required only one free memory, now it is possible to create it without an account, and directly switch to usage. You will only be required to solve a small arithmetic operation to certify you are a real human user. Such memories are less secure than with an account, this is only a way to test the service.
If it is not what you want, at this step, you can go back to add a new memory, or go to your cart:
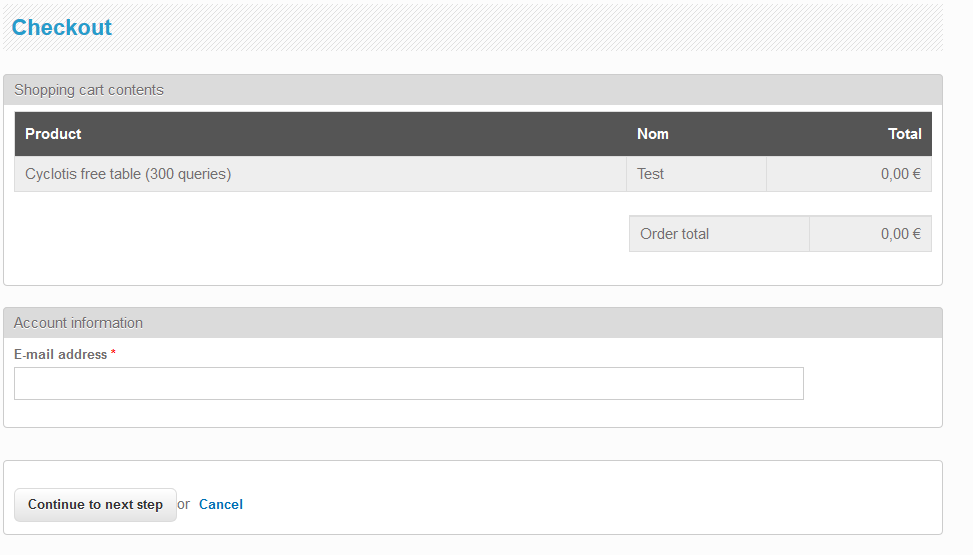
Now you are asked to type your e-mail address, which will be used to create your account and send you confirmation of your orders. Important: create one account per organisation (for your entreprise or for your university, for example), not per user: data can only be shared between users of the same organisation! The simplest way is that your project leader – the person which creates the projects and affect to translators – manages creation of the databases with his personal e-mail, and then distributes the needed data to the translators.
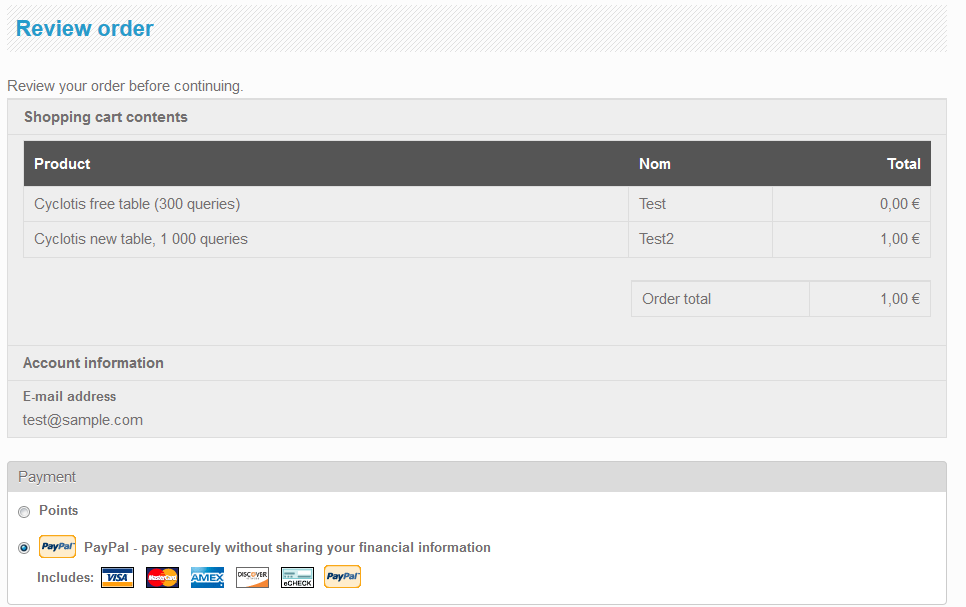
Then, unless you selected only 1000-queries databases, you will have to use a Paypal account (for the moment we cannot provide another payment method, but this can be studied later):
Finally after the last steps you will receive some e-mails confirming first the creation of your account, and if you went to the end, the validation of your order. The effective creation of your project will only take a small amount of seconds.
Now you should be able to use the "User/Password" zones in the top of the page, with the data which have been sent to you by e-mail. If you go again to "My databases", now the contents is a little bit different:
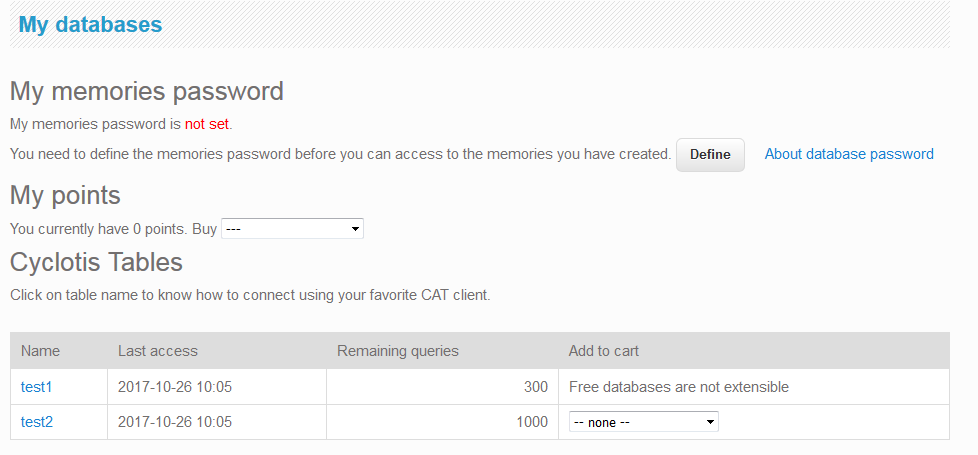
Now you need to define your database password. Why does it differ from login's password? That is because translators who will use the created databases are not necessarily the same persons who create and affect projects to people. The password used to log in should not be distributed, while the database password is to be shared between users of the same database. In the future we will consider the possibility to create one password per translator. For the moment, click now on "Define", type a password and validate: you won't need to do it again for each new database.
Points are a way to reduce the dependency on PayPal: this is nothing more than a pre-paid wallet which you can use to buy databases. Using it reduces the price for new databases. You can ignore it for the moment.
Now each database you bought is available in the next section "My Cyclotis Tables". If you click to one of them, you will see a screen with its properties, and parameters to be used for Trados or for OmegaT.
First, it gives parameters for those who access it via Trados Studio:
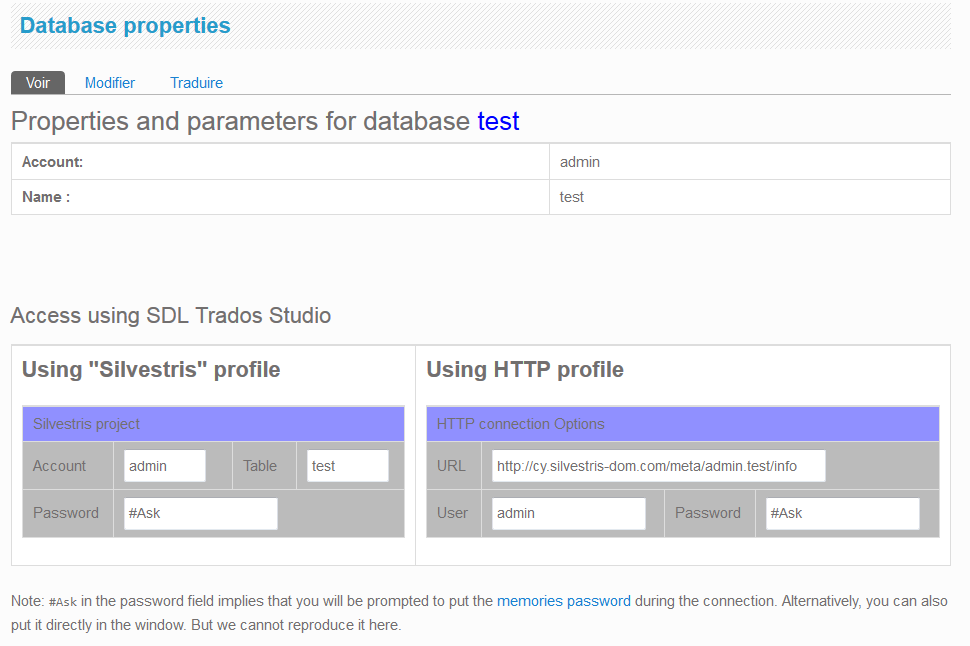
Now you can follow the tutorial about Trados plugin: the first option in the previous screen works with the button "Silvestris-dom.com" (unless you modify the configuration of the plugin), the second option works with "HTTP" button. Both options are equivalent, the first one is probably simpler. But later you may want to replace the pre-configured options with the ones valid in your organisation.
Then OmegaT users, the important part is the bottom of the screen:

Project mode is only available if you selected "identified" and "keep one entry per context" in the creation phase. That is because this mode requires some more information than memory mode.
As described in the previous screen, you can either copy/paste the contents of the scrolled zone, or click on the link to save file. Now this file has to be copied to the OmegaT project you created for the test:
- For memory mode, in the tm/ directory with any name ending with .properties extension
- Or, for project mode, in omegat/ directory and with name project_save.properties
Then if you have patched OmegaT, which you can download here, or DGT-OmegaT, you will be connected to the correct database once you open the project (or, for memory mode only, when the file monitor detects the new file, some seconds later). Standard OmegaT will ignore the file. Now read how to use project mode and memory mode.
Important if you created a memory without an account, then you will be directly redirected to the last page of this tutorial. Keep carefully the informations, because contrarily to memories with an account, it is very difficult to return to this page if you lost it!
Add new comment